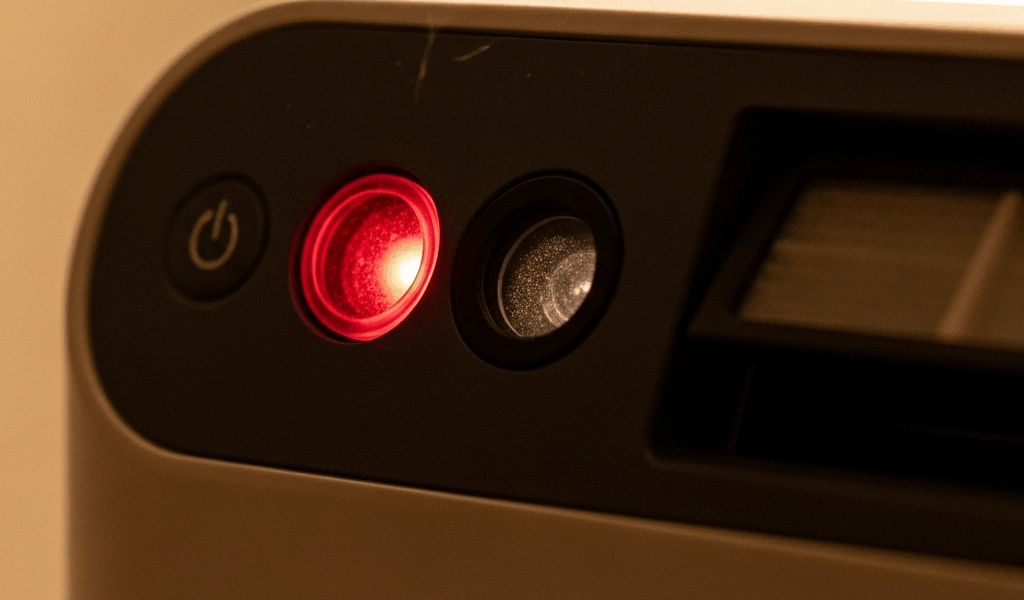
What the Red Light Is Actually Telling You
Air purifier troubleshooting has gotten complicated with all the conflicting advice flying around. Your red light won’t turn off, you’ve reset the thing twice, and now you’re one bad afternoon away from shoving it in a closet. I get that completely.
But here’s the real problem nobody mentions upfront: red lights don’t mean the same thing across brands. Not even close. A steady red on a Levoit Core 300 means something entirely different than a blinking red on a Blueair 211+. Treat a sensor fault like a filter issue and you’ll burn an hour fixing the wrong thing entirely.
So what is a red indicator, really? In essence, it’s your purifier trying to communicate a specific internal status. But it’s much more than that — it’s a code, and without knowing which code you’re reading, every fix you try is just a guess.
Flip the unit over. Find the model number — usually printed on a small sticker on the bottom panel. Search “[brand] [model] red light meaning” and pull up the actual indicator chart from the manufacturer. Takes maybe 90 seconds. Saves you from following generic advice written for a completely different machine than yours.
Once you know what you’re actually dealing with, the rest of this will work. So, without further ado, let’s dive in.
Step 1 — Replace and Reseat the Filter Correctly
Probably should have opened with this section, honestly. Most people skip straight to reset buttons and spend twenty minutes button-mashing while a plastic-wrapped filter sits uselessly inside the unit.
Yes, that happens constantly. You order a replacement filter — maybe a $22 Winix 116130 HEPA off Amazon — you pull the old one, drop the new one in, close the panel, and the light stays red. The sensor cannot read filter life through plastic wrap. It’s looking for physical contact confirmation, not just the presence of something inside the slot.
Walk through this carefully:
- Unplug the unit completely
- Open the filter compartment — usually the back or side panel depending on your model
- Remove the old filter
- Peel every layer of plastic wrapping from the new filter — front, back, and all four edges
- Check inside the filter housing for a cardboard insert or cardboard frame. Remove that too
- Slide the new filter into place until you hear or feel the side tabs click into the slots
- Close the compartment panel until it snaps shut
A filter that’s halfway seated still triggers the red light. The sensor needs full contact. Halfway in might as well be all the way out.
I’m apparently the type of person who replaces only the main HEPA and ignores the pre-filter layer, and the Winix 5300-2 I owned in 2021 kept its red light on for three full days because of exactly that. Turns out the activated carbon pre-filter was still the original unit from 2019. Don’t make my mistake — if your purifier runs a multi-layer system, every single layer needs to be replaced and installed. One stale layer keeps the whole light burning.
Plug the unit back in after installing everything. Some models auto-reset. Most don’t. That’s the next step.
Step 2 — How to Actually Reset the Indicator Light
The reset is not a tap. Pressing it once does absolutely nothing. Your purifier wants a sustained hold — usually three to five seconds — and it’s not going to reward impatience.
Here are the most common reset sequences by brand:
- Levoit Core series: Hold the filter icon button for 3 seconds until the display flashes or you hear a single beep
- Winix: Power the unit off first, then hold the dedicated “filter” button — not the power button — while plugging it back in, holding for 5 seconds
- Blueair: Press and hold the info button until the light blinks or shifts color — typically 4 to 6 seconds
- Generic Asian-market brands: Unplug entirely, wait a full 30 seconds, plug back in, then immediately hold the power button for 10 seconds straight
If none of that works, try the extended power cycle. Unplug the unit for two full minutes — not thirty seconds, two minutes. This drains the capacitor memory. Plug it back in without pressing anything. Just let it boot. Sometimes that’s genuinely all it needs.
Still red? Check whether your unit has a separate power reset versus a filter reset button. Newer models increasingly have both, and they look nearly identical. You might be holding the wrong one. That’s a maddening thing to discover after ten minutes of troubleshooting.
One more thing — newer purifiers sometimes ship with a small plastic pull-tab inside the battery compartment or sensor chamber that has to be physically removed before first use. If your unit is relatively new and absolutely refuses to reset, open the bottom panel and look for any plastic inserts still sitting in place. Manufacturers include them to protect sensors during shipping and don’t always make them obvious.
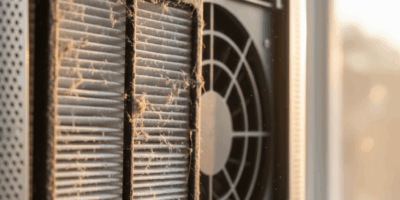
Step 3 — Clean the Air Quality Sensor
This is where most troubleshooting guides stop. That’s exactly the wrong place to stop.
Your purifier has an air quality sensor — typically a laser particle counter or optical dust sensor mounted on a small circuit board near the air intake vents. It counts airborne particles and feeds that data directly to the LED indicator. When the sensor lens gets coated in dust, it reports falsely elevated particle counts. The purifier thinks the air quality is genuinely terrible and keeps the red light running.
You’ve replaced the filter. You’ve held the reset button for five seconds. The light is still on. The sensor is probably dirty — and that’s a fixable problem that takes about four minutes.
But what is the sensor’s location, exactly? In essence, it’s a small plastic lens or window mounted near the intake side of the unit. But it’s much more than that — it’s the component doing the actual air quality reading, and a dusty lens ruins every measurement downstream. Check your manual for the exact position. Some units place it on the rear panel. Others tuck it inside the filter compartment itself.
Turn the purifier off and unplug it. Get a cotton swab and dampen it lightly with distilled water — not tap water, which leaves mineral deposits on the lens surface. Gently wipe the lens area. Light pressure only. You’re cleaning glass essentially, so treat it that way.
Let everything dry for five minutes before plugging back in. If the red light disappears, that was your problem the whole time.
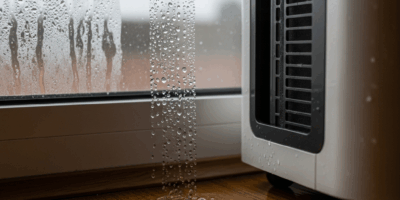
This becomes especially important during wildfire season in places like the Pacific Northwest or Northern California, where smoke particle loads run extremely heavy for weeks at a stretch. Sensors accumulate particulate matter fast in those conditions. Monthly cleaning instead of once-a-year cleaning prevents the false-alert red light from becoming a recurring issue.
When the Red Light Is a Fault Code, Not a Filter Alert
Filter replaced. Properly seated. Indicator reset. Sensor cleaned. Light still red. At this point you’re probably looking at a hardware fault — and that changes everything about what you do next.
The distinction between a filter-life alert and a fault code usually comes down to behavior. A filter-life red light is typically steady. A fault code blinks in a repeating pattern — one flash, pause, one flash again, or a rapid series of blinks. Some units display red simultaneously with a second color light, which almost always indicates a fault condition rather than a routine filter alert. That’s what makes the blinking pattern so useful — it’s your purifier trying to communicate something specific.
Check your manual for fault code definitions. A blinking red might mean “motor error” or “laser sensor malfunction” rather than anything related to the filter. Replacing a filter does nothing for a failing motor. These are completely separate problems requiring completely different responses.
What to do from here:
- Check your warranty period — most purifiers carry 1 to 3 years of manufacturer coverage, and you may still be inside it
- Call the manufacturer’s support line with your model number ready and describe the exact blinking pattern you’re seeing
- If the unit is older than five years, replacement is almost always more practical than repair costs
- If it’s still under warranty, initiate a return or repair claim before attempting anything else that might void coverage
Frustrated by persistent fault codes that won’t clear, plenty of owners have solved the issue simply by leaving the unit unplugged for a full hour — not two minutes, a full sixty. This occasionally resets corrupted internal data that a shorter power cycle won’t touch. Plug it back in, run it for 30 minutes, and check the light behavior before trying anything else.
If nothing works, be honest about what the math actually looks like. A $120 Levoit Core 300 that’s six years old isn’t worth $85 in shipping fees and potential repair costs. A $400 Blueair 411i absolutely is worth a support call and possibly a warranty claim.
The red light that won’t turn off is genuinely frustrating — but it’s also doing its job. It’s telling you something is wrong. Most of the time it’s fixable with a new filter, a proper reset, or a 90-second sensor cleaning. Sometimes it isn’t. Either way, you’re not guessing anymore.


Stay in the loop
Get the latest northwestcleanair.com updates delivered to your inbox.